One of the things I've done to spruce up our apartment décor-wise is using seasonal wreaths on our front door. For the fall, I had a basket with fall colored leaves, berries, flowers and pine cones that I found at Wal-Mart and supplemented with some additional flowers to fill it out a little more. Then for the winter, I found a wreath with a cute little snowman (we named him "Bob") sitting in the middle with a welcome banner over his head. But I was having trouble finding something for the spring. Most of what I saw were twig wreaths covered in colorful Easter eggs, something that's not really my style. So I decided to create my own! :)
Thanks to Jaden over at the Steamy Kitchen, I found an article on making yarn wreaths. She had several links to different people's blogs with detailed instructions on how to make these lovely, whimsical wreaths. I chose to go with Danielle's version over at her blog, Take Heart. You can click on the links there for either blog or just keep reading as I take you on the journey I went on in my quest for a beautiful door decoration.
Yarn Wreath with Handmade Felt Roses
What you need:
*Wreath form (Either styrafoam or straw can be used. I like how easily the yarn slid on with the plastic wrap on the straw wreath)
*Skein of yarn in your favorite color
*Sheets of felt in complementary colors
*Piece of ribbon, twine, etc. with which to hang the wreath
As for tools:
*Scissors
*Hot glue gun (or strong craft glue)
Before you start, I would suggest taking your yarn and turning into an easier-to-handle ball. Many of my knitting/crocheting friends may already know this but I learned the hard way.
 |
| Yeah, the knot took both of us over an hour and a half to untangle. |
The Steps:
Step 1. Wrap the wreath form in yarn. Tie a knot to start and keep the yarn taut. Keep in mind that you will not be able to keep the yarn perfectly aligned and cover the wreath in a single, neatly lined up layer of yarn. But in this case the imperfections are what make these wreaths so perfect. Simply tie a knot to finish it off when it's covered to your satisfaction.
 |
| So much neater with a ball! |
 |
| Ta-da! |
Step 2. Make your felt flowers. Choose a sheet of felt and cut out a circle. The bigger you cut your circle, the bigger the final flower will be. Then cut around the circle to give it a wavy look (this is important to give your flower a more varied/real look and the "petals" different heights).
Then choose a spot on the circle and start cutting a spiral from your felt circle. You will end up with a small oval at the end of a long strip of felt. Leave this as-is since it will create the back/base of your flower.
Starting with the tip where you began cutting, roll the felt. Keep it tight in the beginning so everything stays together and then you can loosen the roll as you go, which will serve to create a more open flower. I also used a little drop of hot glue when needed to hold the rolled felt together. More than once I dropped the roll and had to start over.
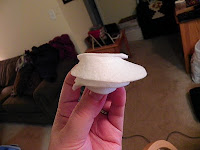
When you get to the end, use some hot glue or strong craft glue to attach the bottom (the oval from the spiral) to your flower.
 |
| With the bottom attached |
 |
| First finished flower! |
Step 3: Assemble your wreath. This is where you really get to personalize. You can arrange your flowers in a line going up your wreath, in a grouping, or however you want. You could add any little knick-knacks that you like as well. I chose to go with a simple line up the side of the wreath and added a couple of leaves. Again you can use strong craft glue or the hot glue gun (my method).
 |
| In the process of attaching... |
For the final touch, add a ribbon, raffia, twine or other means of hanging your wreath and ENJOY!
 |
| Ta-da! |
Thank you so much for indulging my creative bent :) I absolutely loved making this wreath (minus the huge knot I put in the yarn, of course) and I'm really enjoying having it welcome us and our friends to our home. Maybe someday I'll get the chance to perfect my skills and sell some wreaths a la Etsy? :) Who knows?! But for now, I had a lot of fun making and now enjoying this labor of love. I'd love to see yours if you make one! Please feel free to share in the comments section.
Happy crafting!
Soli Deo Gloria!
Meghan
P.S. The transformation of the blog has commenced! The new colors and header are in place! New web address will take effect Monday so keep an eye out for the new URL! :) I'm so excited about this new phase for the blog and hope you get a chance to check it out!


1 comment:
Adorable! I love the roses...I'm thinking headbands for the baby are in my future. :)
Post a Comment